Tuesday 28 April 2015

The fascination with Polaroids

Since I figured out how to use my camera and film to get proper results, I've become quite excited about the whole Polaroid experience. I never had a Polaroid back then when they were popular, and I don't think I've ever even taken a photo until about a year ago, when I found a Polaroid in a second hand shop. It really was a great find. The camera, a Polaroid 635CL Supercolor Jubilee, came complete with box, instructions and the little plastic band tightly wrapped around the straps. In other words, it looked like it never actually had been used at all. I knew that film for the original Polaroid cameras had become available again after the company shut down and the factory was bought by The Impossible Project, and had wanted to try it out for some time but didn't have a camera. So of course I was very pleased to finally find one, and one that was basically brand new, despite being a good 20 years old.


The fascination back then, when Polaroid cameras were first produced, of course was the instant factor. Instead of having to wait for your roll of film to be developed, you could see your photo instantly, within minutes. Ironically, that instant experienced has now become almost the opposite. With the new Impossible films, the image takes about 30-40 minutes for colour films and about 10 minutes for black & white to develop. They also need to be kept in a dark place, or upside down until they're fully developed, for a good result. For me, that is part of the excitement. For the instant experience, I have my DSLR and my iPhone, where I can see the image immediately. With the Polaroid, you take a photo, and then quickly put it somewhere dark, such as between the pages of a book. Then you wait (im)patiently, and after about half an hour, you take a first sneak peek. Sometimes, the images is already looking good, sometimes, it still needs some more time. 


The images have a certain feel to them, they look a bit dreamy, sort of remote, which I like a lot, and which I think suits the old cameras. For sharp and crispy colours, I have my DSLR. I also like that you never quite know how your photo turns out. Although of course you'll learn from experience the more photos you take. So while I would delete an out of focus taken with my DSLR immediately, with the Polaroids, I don't actually mind when they turn out a bit blurry. It's much more about capturing a certain moment.


 And sometimes, you get some funny effects, like with the photo below, where I was accidentally blocking the film ejection slot with my finger, preventing the image to come out smoothly just for a fraction of a second, which in turn created that funny effect at the bottom. I find it fascinating, how fragile the whole process is.


I also like how you need to put much more thought into taking a photo. When I go for a one hour walk in the nearby forest with my DSLR, I easily come home with 100+ photos. With a Polaroid film, you have 8 images, and the films are expensive, so you don't go snapping here and there, but you really have to think about when and where you want to take a photo. Which view, which moment you want to capture, if the light, the distance, the subject are such that you can expect a good result and not waste an expensive photo (and believe me, I've wasted a few!). The whole process makes you slow down, think, and be patient. It's just a completely different experience than with my DSLR (and I love my DSLR and shooting digital).


The only thing I'm not so happy about is that my scanner isn't quite able to reproduce the photos accurately. I've tweaked them slightly in Lightroom to get them closer to the originals, but the colours just aren't quite right. And those spots you can see on some of them is simply the dust on the scanner. The originals really do look a lot better, and are nice and clean. But I guess that's part of the experience too.


Friday 24 April 2015

A little painting work in progress, and some Polaroid success

What a week this has been. One of those that you just want to move into some dark corner at the very back of your mind and never think about again. Just delete, and move on.

So on to something more cheerful. I have taken out my paints and brushes again, although I haven't really got very far yet. I've been taking a lot more photos again lately, and dived back deep into post processing in general, and Lightroom in particular. It's time consuming, and didn't leave much time for other things. But it is also a lot of fun and the beautiful trees that are in full bloom, showing off their delicate white and pink blossoms, are just making me happy. I just can't stop taking photos of them, with my DSLR, my iPhone, and my Polaroid.

I've taken out and been playing around with my Polaroid camera again, and I think that I might finally get the hang of it. After having wasted about three or four films, including a colour one with silver frame that I particularly liked and that the shop I buy the films from doesn't seem to have anymore. (A little tip: read the instructions...). With the first one, it was pure luck that it turned out alright, with the other two, well, they were after I read those instructions... The scanner doesn't do them quite justice, the colours are much nicer. But I'm really quite excited about the Polaroid experience again, and I'll be taking my camera out much more often now. And without wasting quite so much film anymore.


But back to the painting. I haven't that much to show yet, only a background - which isn't even finished yet. But I'm sharing it anyway - and linking up with the inspiring Paint Party Friday - as a reminder to myself to keep going and finish it, so that I'll have something proper to share next week.

Wednesday 15 April 2015

Penguins and Seals

I still got so many photos of amazing creatures left, that I'm going to split them (well, some of them) into two separate posts. This one is for the Humboldt Penguins and the Common Seals. The penguins didn't really do much, but they were fun to watch. And they kept standing or sitting still or moving only little, which was of course perfect for taking pictures of them.


I don't know how long we spent watching the seals, but it was quite some time (and long enough to miss the little train back to town by just a few minutes). They were one of the first we went to see in the morning after we arrived, and we went back to them again in the afternoon. N lent me his big zoom lens to get some really nice close ups. It was fascinating to watch them swim and dive (they like to swim on their backs) and to stick their heads out of the water and observe their surroundings. Their noses look a bit like those of gorillas!


One last post with more sea creatures to follow soon.

Sunday 12 April 2015

Spring blossoms

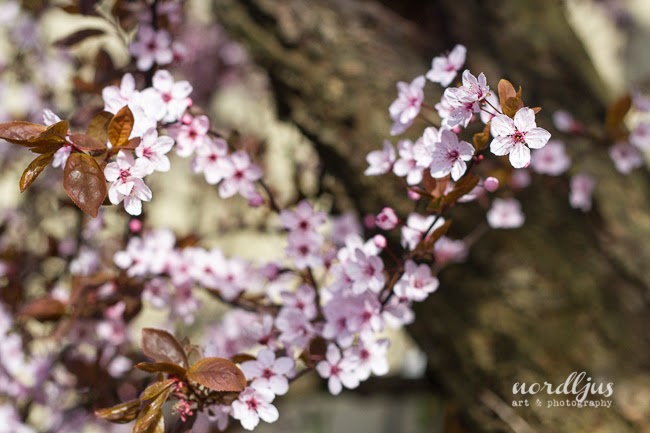
Spring has arrived, and for good, it seems. Temperatures are rising quickly, although bit too much for my personal taste. I went up to the woods this morning, for a walk up and for some inspiration and Being Present; to see and listen. I took my camera, and decided to only use my 50mm lens. With my allround 17-70mm lens, it's easy to "get it all in".Get the wide angled view before you. Or just zoom in. Not that that's a bad thing. But sometimes, it's good to stretch yourself a bit. Having to compose your image more carefully, having to move closer to or away from your subject to get the picture you want. Standing on your tiptoes to get that shot. It helps you to observe, see, paying attention.

It is still looking very bare in the forest, except for all the beautiful tiny flowers covering the ground and making the best of the light before the trees grow their leaves, if you care to look. But the most striking at the moment are the gorgeous blossoms. So delicate and fragile looking. So cheerful. Delighting both the passerby and the bees. Have a beautiful Sunday!


Thursday 9 April 2015

More stitching

I stitched another two sketchbooks over the Easter weekend, using the Coptic stitch. Once you remember and get the hang of it again, it really is quite straight forward. Back and forth, back and forth.


I used a green thread for these two and I want to make the covers and spine green too. Or maybe use an old map for the coversf or one of them. I've got two big bags full of old maps, which are always in my way. Time to start using some of them. The stitching is far from perfect, but it holds together nice and tightly.


These two are also a Fabriano Tiziano 160 g/m3 paper, but a different colour, Avorio, and size, 70x100cm. This paper size needed a bit more folding than the smaller one making the size of the sketchbooks 17x25cm. Same height as the other one, but slightly wider.


For this coming weekend, I'm planning to finally get the paint tubes and brushes out again, so these two will have to wait for a bit before getting finished.

Monday 6 April 2015

Deep down in the deepest sea

I've been quite lucky with the weather on my visits to England before, but I guess one can't always be that lucky. During my 5 day visit over the last weekend, we had one really nice day, Friday (where we went for a lovely walk on the cliffs), and four cold, grey and sometimes wet ones. After having spent three lazy days, we decided to head off to Weymouth, to Sea Life. It was cold, and very grey, but the creatures there made for than up for it. They were just simply amazing.

These Moon Jellyfish were absolutly fascinating. I could have watched them for hours, as they gracefully floated through the water, reflecting colours of the changing light. Don't they just look like creatures from outer space.


Of course I took lots of photos of other animals too (about 500 in fact), and I'll share some of them (don't worry, I won't post all 500) later. But I thought these jellyfish deserved a post of their own.

Saturday 4 April 2015

Making your own sketchbook

I was really looking forward to this long Easter weekend, and after having most of the re-organising and importing into Lightroom of my old photos sorted, I was determined not to spend it all in front of the computer. For today, a misty, very rainy and cool perfect-to-stay-indoors day, I decided to do some bookbinding. There are loads and loads of sketchbooks available, in all kinds of formats and sizes, and and with different papers, but sometimes, the exact size and paper you want may just not exist. Making your own sketchbook allows you to choose exactly the size and paper that you want and it's fun to make (and actually not that difficult). And you can even cover it in some pretty paper.

I used some sheets of Fabriano Tiziano 160 g/m3 paper (colour: Perla), sized 50x65 cm, which I had cut in half and then folded. This makes the size of my sketchbook about 16.3x25cm. With all the cutting, folding and assembling the gatherings done, it was time for some punching, stitching and glueing.

First the punching. I finally got to try out my new Japanese screw punch. These seem to sell more quickly than the shops can stock them, and I had to wait several months until I finally managed to order one, together with some different sized punches. The one I used here is the 1.5mm.


Next the stitching. I have a whole pile of books on bookbinding, with different techniques and step by step instructions. I must admit that I have never been able to understand, let alone follow, any of them. So I always go back to the same method, the Coptic stitch. I found a PDF instruction that I more or less managed to make sense of on the internet some time ago, and I've been sticking to it ever since. I still get confused regularly, and usually have to go back and undo a few steps before getting the hang of it again. I just don't do it often enough. But usually, I manage to get it all stitched together in the end. If you haven't done any bookbinding before and would like to try it out, there are loads of resources available online, and I'm sure you'll find one that suits you, and that explains it much better than I ever could.


In addition to my gaterhings of sketchbook paper, I used a single sheet of folded paper as endpapers at the beginning and end of the body of the book. This allows you to glue the covers on to them without having to sacrifice a page of your good sketching paper.


With the gatherings all stitched together, I cut two pieces of cardboards to size and covered them with some pretty patterned paper for the covers.


Then comes the trickiest (I find) bit, glueing the covers on to the endpapers. I never know which one is the better way; to put the cover on the table and stick the body of the book on to it, or the other way round. You want the cover to sit straight, aligned with the spine, and with an even slight overlap around the other three sides. And the endpaper covering the folded over patterned paper, leaving an even margin on the tree sides. It's a bit of a fiddle, and everything being covered in glue, including your fingers, doesn't help. But you do have a bit of room for adjustment.


Last step is to cover the spine. I used a special bookcloth that I cut to size.


While cutting it out, I left an extra bit on both sides, the length of the spine and folded it over and glued it down, for enforcement. A very neat way, of course, would be to add a headband. I might put that on my shopping list for my next oder.


The last bit then is to put the bookcloth over your spine and glue it down on to the covers. Preferably without smearing glue on top of and staining the cloth. Which I find is pretty much impossible.


And there you have it. Your own, hand made sketchbook, ready to be filled. And with the Coptic stitching, you can open it completely flat on your table.