Monday, 31 October 2011

Happy Halloween

Have a wonderful Halloween everyone who's celebrating it! As I've mentioned before, we don't really have Halloween over here, although when walking back home from the station, I've actually seen a few kids here and there dressed up in some rather improvised bedsheets-turned-into-ghost costumes running around with bags ready to collect some sweets. I'm not sure how many of them actually know what Halloween is, and where it comes from, but I guess the sweets are just too tempting :). Well, they didn't ring my doorbell, which is just as well, as I didn't have any sweets. All I've got are my gorgeous pumpkins, and I'm still fascinated by them. I just love their colours and shapes!


And they're a perfect subject for practising my sketching and watercolour painting skills. The green spotted one I enjoyed particularly, patiently buidling up one layer after the other. Here's a step-by-step of how I did it. It really isn't that difficult, it just takes some time and patience. (Unfortunately I don't seem to be able to make that picture series bigger than this):


It's so relaxing, like meditating! Just concentrating on the colours and patterns, putting one brush stroke or dot after the other, down on to the paper. I've done three of the five (although the warty one isn't finished yet), so there are two more to go. And then one of them also wants to be turned into a nice soup!


And then there are all those lovely leaves everywhere outside! I've started painting some of them too, and I've got lots more to do. I'm so glad I re-discovered my watercolours. All these autumn things are just perfect for them. I'd never thought I'd enjoy them so much!

Sunday, 30 October 2011

My favourite London shops ~ Shepherds Falkiners: A perfect paper heaven

For the past 5 years, I've spent at least one week of my summer holiday in London, taking courses in Book History at the London Rare Books School (LRBS). I love the area around Russell Square, in the famous Bloomsbury area, and I've discovered some fabulous shops which are leading my London Top Favourite Shops List. I've meant to write about my three most favourite art materials and craft shops alredy in summer, but I forgot to take the pictures of their shop fronts that I meant to. So I decided to put it off until after my short trip to London in October. But what can I say - I forgot to take pictures again! Well, I must have been so excited to enter the shops, that it completely slipped my mind (and afterwards had my hands too full...)!.

So I've now decided to write about them anyway. After all, I've got enough photos of the fabulous stuff I bought there :). All three shops are conveniently close to each other, and only a few minutes walk from the British Museum's main entrance. The first shop I want to share with you is the one I've discovered the first year I stayed in Bloomsbury: Shepherds Falkiners, a fabulous shop specialising in fine papers and bookbinding supplies, located in Southampton Row (turn left on Great Russell Street (facing away from the BM entrance), cross Southampton Row, and then it's just a few steps to your right). The shop, though not big, is nice airy and light, with some lovely dark wood furniture, and the colours, patterns and textures of the papers are just so wonderful, a real feast for they eye. It's probably a good thing I don't know anything about book binding, at least the practical-making-it-yourself-part, or I'd probably spend a fortune in there. They do have a series of courses they offer, both in London and Wiltshire, and I'm still hoping that they'll be having one at a time when I happen to be staying in the area. I've always fancied learning some basic book binding :)


I'v wanted one of those gorgeous boxes already the first time I've stepped into the store, but I never figured out how to get them home. No space in the suitcase, and back then, it was still strictly one hand lagguage policy in the airplane. I didn't want to send it back by mail either, as I feared the edges would all get damaged. So no chance. But this time, at last, I got my box! I took my big suitcase for the few days, half empty, to fill it up with goodies :). And I didn't just get a box, but also a pencil box, a pencil holder and a sheet of paper. I simply couldn't resist the paper, even though it's almost impossible to get it home without creases. But I'm going to clue it on top of something anyway, so I guess it doesn't really matter.

I bought the bonefolder back in summer. I've been looking at quite a few bonefolders, but this one was the only one that really was perfect. The size and shape, and it's slight bend that makes it lie in your hand just perfectly. Why all that fuss about a simple bonefolder, you might ask. Well yes, maybe. But. It's the small details that turn an ordinary bonefolder into a fabulous, perfect one. And I love details :).


If you're ever in that area (and it's an areay well worth visiting), do pop in there and have a look. They also have notebooks, diaries, greeting cards and other things that make great gifts for people who appreciate quality paper crafts. And they also got an online shop (with reasonable shipping costs to Switzerland, which is not always the case), so I'm sure I'll be ordering some more of those papers :). Unfortunately, they don't seem to have the boxes in the online shop, though. Well, a good reason to go there again next time I'm in London :)

Oh and make sure to take a few minutes to visit lovely Russell Square. It's such a peaceful place, especially in the autumn light - and the café serves a tasty English breakfast too :)


Next Sunday, I'll show you another one of my Favourite 3 London Shops, and we'll be going stamping mad. (And maybe I'll even managed to get some pictures of the shop).

Have a fabulous longest-day-of-the-year Sunday!

Friday, 28 October 2011

Autumn fire

There's this glorious tree in my street. A wonderful, bright red, looking like it's on fire. I had wanted to take pictures of it on Monday, but completely forgot and didn't remember until it was already dark. Luckily, we didn't have any bad weather this week, and today I made sure to take pictures.


I found these great story board templates at Paint the Moon Photography. They were freebies, but there's some other great stuff too in the shop that's very tempting. These templates are actually not so difficult to do yourself. It just takes a bit of work to do them, but once you've got your templates, you can just use them again and again. But it's also nice to use some that someone else took the trouble to create from time to time ;)


I especially like the first one, because of the transparent background, as it blends in so nicely with whatever colour you have for your blog background. I'm sure there's a way to change the colour of the background in the second one, and I'm sure I've done it before. I just don't have the patience to figure it out right now.

I'm just so fascinated by the colours outside at the moment, and all the leaves everywhere. I'm always picking up leaves at the moment, everywhere I go. Red ones, yellow ones, orange ones, in all shapes and sizes. All my notebooks are full of dried leaves :). And I've spent all morning painting them. Watercolours are just perfect for it! 

Thursday, 27 October 2011

Letting it flow

I love how sometimes things just seem to grow and develop by themselves, into something you didn't expect at all. Last week, after I got back from my trip to England, I wanted to try out some of the thingsI  had bought in my favourite shops in London. I had seen an image on Pinterest that inspired me. An airy dainty little watercolour. It was the pose that attracted me. The face of a woman, head bowed,  eyes closed, with the hair covering half of the face. I knew it wasn't going to be airy and dainty at all, as I wanted to try out the new shades of oil paint sticks I had bought (more about those delicious oil sticks later, in a separate post). In fact, the result doesn't have anything in common with the painting that inspired me, apart from the closed eye and the half hidden face.


I had always wanted to try out oil painting, but somehow had never quite gotten round to it. It always seemed to be too complicated somehow. So much stuff you needed, and then the long drying time. Acrylics are just so much easier to handle. The oil sticks, however, seemed to be a perfect compromise to try it out at last. And I just love their creamy richness. You can paint with them directly on to the paper, like a crayon, and use your fingers to spread and blend the colours over the surface and to paint your picture. You can also use them with a brush, but I didn't have any special brush cleaner for oil paints, so I haven't tried that out yet. Here I just painted with my fingers entirely. I love doing this anyway. You really get the feeling for your materials this way. Just you, the paint, and the paper, so to speak.


I didn't pay any attention to proportions or real life likeness etc. The nose especially, I didn't really bother about. It was the expression of the face - the eye and the mouth - I was interested in. And most of all the colours, the soft pinks, the rich reds, the deep purples - Muave, Dusty Rose, Dioxazine Purple, Cadmium Deep Red, Alizarine Crimson, Grape. Oh, don't you just LOVE the wonderful, promising names of colours?

I absolutely loved doing this art journaling page. It just seemed to pour out of my fingers on to the page, the image emerging, layer by layer, in front of my eyes without me really knowing where it was going  and how it would turn out. I also didn't have any intention of adding text, but at one point, I looked at it, and the word "strength" just came into my mind, and I just had to add it. And this is the final result:


The whole picture felt like something I just had to. Something inside me that wanted to get out, and on to the page. And I have a feeling that this is a painting I will turn to again and again, whenever I'm in need of some calm and strength. To remind me to close my eyes for a moment, to take a deep breath, to collect myself, to find some calm, ease and strenght somewhere deep inside me, before opening my eyes again and facing the world.

Tuesday, 25 October 2011

Week 35 ~ Oh my Gourd!

This week (week 35) at Picture Inspiration is all about the gorgeous pumpkin: Let us celebrate the gorgeous gourd!, Tracey declared, and wanted us to focus on "relationships" with our subject matter.

Now we don't have Halloween here, and so pumpkins aren't quite so "big" a thing as in other places. But we still like to use them as seasonal decorations, bringing the beautiful warm autumn colours into our homes with them. But we most of all love to eat them - as tasty, delicious, creamy, rich pumpkin soup (with curry, a splash of cream and some pumpkin seeds in this case).

I had a lot of fun with these pumpkins (and I'm sure I'll have lots more, as I intend to devote some of my weekend to the intense study of them, trying to sketch, draw, and paint them). I took so many photos that I risked the soup getting all cold in the meantime. I had a hard time deciding which photo to chose for the prompt, but finally went with the one above - and made a little collage with the rest :).


And I got to enjoy my lovely soup. It was delicious (and still hot enough). My relationship with my subject? - Very satisfying! :) Now I'm really looking forward to the weekend and to bringing those shapes and colours on to paper.


And I really intend to keep up with Picture Inspiration. I've been trying to, but didn't do a very good job so far, I'm afraid. I've posted some pictures in the group pool, have taken some more but never got round to process, let alone post them, and with quite a few prompts didn't even manage to take a picture at all in the first place. It's less than 20 weeks to go now, and I will do my best to keep it up now for the rest of the course, and take and post a picture each week, both here and in the group pool. It should be doable, right!?

Monday, 24 October 2011

Don't you just find...

... autumn so inspiring? I just love all the oranges, yellows, reds, greens everwhere, the warm light, the foggy misty grey chilly mornings, the pastel blue skies setting the trees afire in the afternoon, the rustling of the fallen leaves under your shoes, coming home to a cup of steaming hot chocolate ...


As I had to work yesterday, I'm having today off, and the day is presenting itself like an advert for the perfect October. So I'll be out this afternoon hoping to catch more of this wonderful autumn and get lots of inspiration for preserving it in my sketchbook. Have a wonderful day!

Friday, 21 October 2011

Too many ideas, too little time

I just realised it's ten days since my last post. So much about my resolution to write and post regularly on this blog (at least about three times a week is my current goal)! I've spent a short holiday/long weekend in England last weekend, with two trips to London to visit my favourite shops and stocking up on various art supplies and stuff (more about this later ) and to see two excellent plays at the Haymarket (The Tempest - oh I loved Ariel!) and the Wyndham Theatre (Driving Miss Daisy), and three days of spending the day strolling through country houses and their parks and gardens, among them my favourite place, Anglesey Abbey (never get tired of visiting this place!). And then there's work, there's the Blogging Your Way e-course I'm spending quite some time on, filling my notebook like mad, and all the new paints and things to try out. Not to speak of the hundreds of pictures I took in England that are waiting to be sorted through, looked at and post processed.

So I'm posting this post today, which I meant to post last week, before my trip. I spent the weekend two weeks ago with my watercolours - the bad weather was a perfect excuse to stay at home and paint.


I love blueberries, and an old photo I posted on Flickr last year was perfect to copy.


I really love the layering possibilities of watercolours. I know I've mentioned before that it is rather different than painting with acrylics, but I still find it very fascinating. And I'm still loving my squirrel brush. (Btw, Nigel, to answer a question I meant to answer ages ago: the other animal hair famously used for the finest watercolour brushes is that of the Siberian weasel, or kolinsky, known as Kolinsky sable-hair brushes, or simply just as pure Kolinsky. They're made by using hair of the winter fur of male animals).


But it always takes quite some time for them to dry, and it does require patience. Much more than acrylics, where you can just use a hair dryer to speed up the process. But it's not really such a bad thing.


The most difficult part of all, though, is to take pictures (or scans) that reproduce the colours accurately. I really find that quite impossible. Even more so as I do a lot of my painting in the evenings, after work, with no natural light.


Some finishing touches, and they're ready to go into a frame and up on the kitchen wall. Or more likely into the portfolio, together with all the other ones... I really enjoyed doing this, so much that I decided to use it as my blog header for the moment (I'm working on a new one, but it may take some time).

My head is full of ideas right now, for paintings I want to do, sketches to try out, colour charts to put together, art journaling pages to be filled, pictures to process, pictures to take, blog posts to write, and most of all, with ideas for improving and (re-)designing my blog. But I'll have another busy weekend before me - I'll have to work on Sunday :( - so I'll still be needing some time to catch up with everything - both with working on my own blog and with staying in touch with other bloggers. I'm still here, I'm still visiting and enjoying all the wonderful work out there, and I'll be in touch again more actively soon. It's a promise!

Tuesday, 11 October 2011

Create your own link buttons for your blog

Are you not too happy with the link buttons provided by other social networking services? Do you feel that they just don't really fit the design of your blog? Wouldn't you prefer them to match your style and design, and to express your creativity? Well, that's how I felt about them, and so I decided to play around a little bit with watercolour paints and Photoshop Elements, and see what I could come up with. I'm quite pleased with the result, and I'd like to share the process with you. It's really quite easy, so why don't give it a try?

Start with a plain sheet of watercolour paper and draw as many squares as you need. I made them 8x8cm each, but it doesn't really matter what size you make them, just choose a size that allows you to write and paint on them comfortably.


Then use some masking fluid to write the text into the squares. Masking fluids often come in bottles, and you can just dip your brush into them and apply directly on to the paper, giving you great flexibility as to thickness and brush strokes etc.You can also get them in bottles with some kind of applicator attached, which allows you to write with them directly on the paper (that's the one I used).
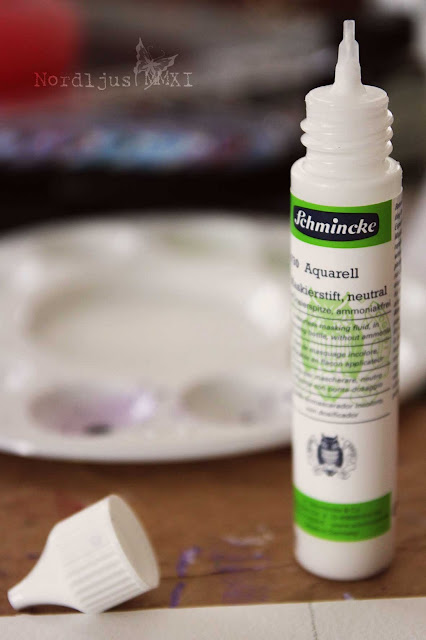

My bottle was a bit sticky on top and the fluid wouldn't come out at first. So I poked around with a toothpick, removed the cap, poked some more, put it on again, and gave it a good shake. With the result that I ended up with a whole puddle of it spilled all over my paper. If something like this happens to you too, don't worry. Just wipe the fluid away from the areas where you don't want to have it (it dries quite slowly so you have enough time). Take the bottom end of a brush, for example, and dip it into the puddle to write your text. You might just not get quite such an even look with this (as you can clearly see in my examples). Make sure that all the areas you want to leave white are covered with the fluid. Most masking fluids are white, but you can also get coloured ones that help you see it better when it dries transparent.
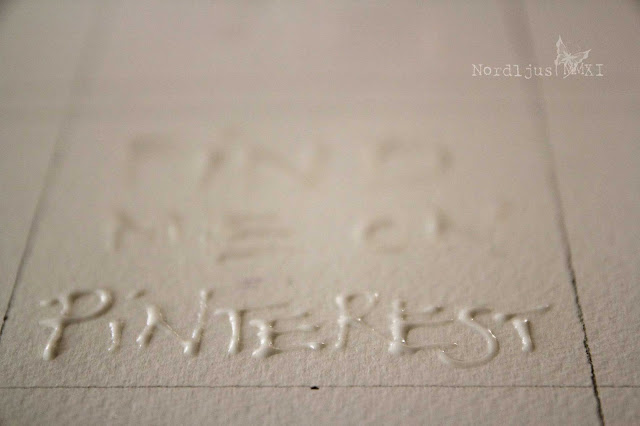

Let the fluid dry a little bit. It's okay when it's still a little bit sticky to the touch, but it should be solid enough, otherwise you'll just smear it around when painting over it, and your design is ruined. When you feel it's dry enough, take out your watercolour paints and start painting the squares with the colours you like. I actually made a little mistake - the colours for my Twitter button (I don't actually have a Twitter account I want to use right now, I just did one in case I'll decide to set one up soon) were actually intended for the Flickr button. Well, a bottle of coloured masking fluid is certainly on my shopping list :). But it doesn't really matter if some little mistakes happen, as these are your very own, individual designs, and really, you can make them however you want them.
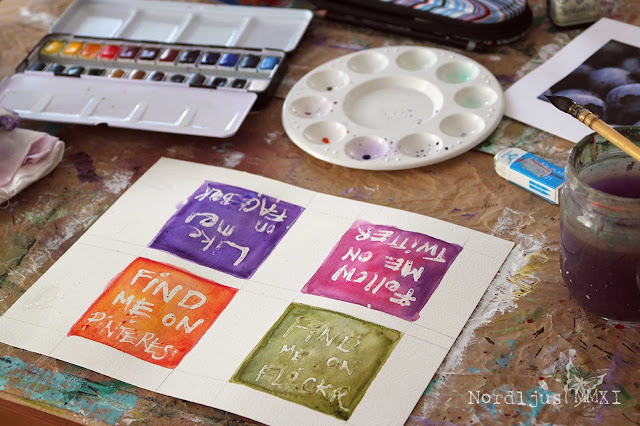

The masking fluid rejects the water and protects the paper underneath, which allows you to cover the space freely with an even layer of colour, without having to fiddle around and trying to leave out the letters. It wouldn't really work anyway, and you can always tell. The brush strokes just aren't looking smooth and even.


Apply several layers and colours (letting them dry in between) until you're happy with the result. Then let the whole thing dry thoroughly. I know. It requires patience, but I'm afraid you'll just have to go and find something else to keep you occupied with. If it isn't completely dry, especially the masking fluid, you won't be able to peel it off. Also, a drier to quicken the process won't work here, as it will just soften the fluid again.


When it's dry, just rub the masking fluid off with your fingers. It comes off very easily, so be gentle. Your text appears underneath crisp and clean.


Now scan your sheet of paper, save as .tiff or .jpeg (or both), and upload in Photoshop/Photoshop Elements to resize and edite if required. You can either leave it in the original size and have it "shrunk to fit" automatically when you add it to your blog. This resizes it to 220 pixels in width on Blogger, for example. This is rather big though, I find, so a better option is to resize them the size you want, and upload it in that size. You might have to experiment a bit to find the size you're happy with. I had them resized 180x180 pixels, but I might want to make them even a bit smaller, as they're still quite big.

To upload the buttons on your blog, just go to Design >> Page Elements in Blogger and click on the Add a Gadget link top right. (Dashboard >> Appearance >> Widgets in WordPress). Upload your image, and add the link of your Facebook, Flickr etc. site you want it linked to in the link box. Add title and caption if you want to. (In Wordpress you also have the option to align your image and determine its size directly in the Widget upload box, apparently). Position your Gadget (or Widget) where you want it to appear on your blog - et voilà, you're very own link buttons, matching your blog design, colour scheme, and creative individuality.


I really enjoyed doing these, it was much simpler and faster than I thought. I'm sure I'll be making more of these things for my blog and keep changing them from time to time :). And I hope you find this little tutorial helpful and inspiring too. And if you like, come over and Like my Facebook Page, so that I'll eventually get a proper url for it :)

Sunday, 9 October 2011

How to be a successful blogger

Are you wondering about what makes a successful  blogger? Someone who's blog gets noticed and read, and who manages to write those kind of posts that people want to leave a comment on and to connect with others? Well, so am I. And I'm afraid I can't give you any answers to these questions, because I haven't go a clue, really.

It's almost a year now since I started this blog. I've now written almost 200 posts, an there's an average of about 30 visits each day according to the statistics. I don't really know who reads my posts. A lot of those visitors seem to come via a Google search.


It's all about connecting. I don't seem to be very good at that. Admittedly, I find it often difficult to find the time to spend a considerable amount of time with reading and commenting on other people's blog. But I do try, and I've also made an effort to try and connect with a few artist/painter bloggers from an e-course I took, whose styles appeal to me and with whom I find it would be interesting to connect. The result so far is not very encouraging. None of them seems to have any interest to connect, at least not with me.

So I've been thinking quite a bit about my blog and why I'm doing it (I must admit I'm still not quite so sure about the why). After all, it does take a lot of time to write a post and to take and process the pictures to go with it. I've been thinking about quitting once or twice, because after all, a blog is meant to be shared with whoever is out there and if no one's interested, well what's the point? I can just as well write all this stuff into my personal art journal or diary. Well, if it wasn't for my Flickr/blogger friend Nigel from Finnesse Fotografic, who keeps visiting my little corner of the blog universe and leaving kind, funny, encouraging and inspiring comments, I might well have quit. Thank you, Nigel, I really appreciate it!

So I've decided not to give up, yet. I'm willing to give it another chance, and to try to improve both my blog and my efforts to connect with others. I'll try to set some time apart during the week and/or the weekend to read and comment on blogs I like, and I've also decided to sign up for an e-course (I'm getting quite addicted to those) about blogging and how to improve one's blog and blogging skills, Blogging Your Way. Because apart from the frustrations it sometimes causes me, I'm actually quite enjoying it.

The class starts tomorrow, but we've already received some preliminary informations and instructions for accessing the forum etc., and I've spent some time today going through it all. There are two things especially I already liked a lot about this class: 1. there's a PDF-download button for every class blog post. I'm one of those people who like to print out all information and put it into folders, so that's perfect. 2. there's a class outline, complete with boxes to tick off, spaces for notes, lists to fill in with your own priorities, progress etc. and templates for notes for blogs to read and connect with. I love lists, and ticking items on them off. So, it looks like it's a class to my liking, and I'm really looking forward to when it will start tomorrow. There'll even be homework! Yay! ;). I hope to pick up some tips and tricks for improvement, and hopefully, there's soon be some noticeable changes to this blog :).